P.S Down below is a playlist made by Mr. George that will inform you about stabile sculptures and guide you through the process of making one.
Image Sources:
- kinetic-artist
- brucegray
- 1stdibs
- flickr
- etsy
- hanging - mobiles
Art is fun when it's full of exciting activities for students to dig into their creativity. There are all different kinds of art projects and it's sometimes hard to choose from. As fifth graders, we will be studying about stabile sculptures and actually making our own. Have you ever heard about this topic? You probably haven't because it's a project that isn't very famous. I am wondering how did Mr. George, our Art teacher find out about this amazing topic. When he introduced this topic to my classmates and I, I felt pretty boring since this topic was pretty complicated for me and it sounds lame. As we get further into our projects, I started gaining my interest from the fun activities and planning sheets that were given out. We were told to look up images, videos and do some research on this topic. I was the most inspired when my art teacher showed me a real stabile sculpture made by an artist and it was amazing. I will ask him for the website and share it with all of you later. Sorry for going on a tangent:) Let's look at some images for a better idea of what a stabile sculpture looks like:
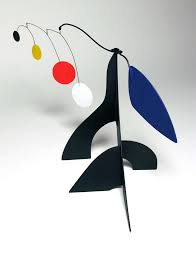
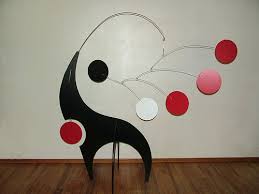
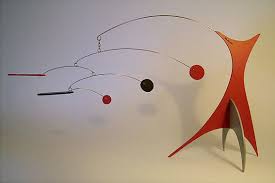
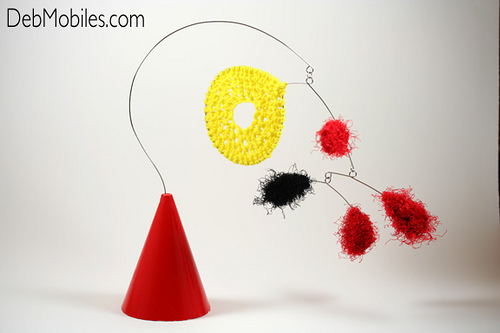
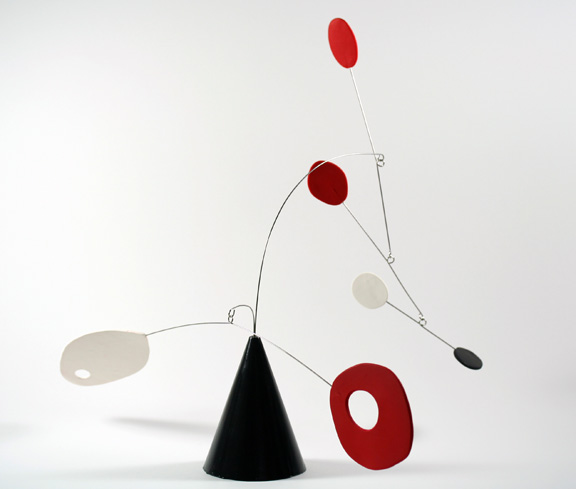
These are just some basic examples of stabile sculptures. We can also use other different materials to create this abstract sculpture. In my opinion, these stabile sculptures look very abstract when the shapes hanging from them are balanced and their shapes are very unique. I am looking forward to making one this quarter:)
P.S Down below is a playlist made by Mr. George that will inform you about stabile sculptures and guide you through the process of making one. Image Sources: - kinetic-artist - brucegray - 1stdibs - flickr - etsy - hanging - mobiles
0 Comments
PAINTING MY BACKGROUND
Welcome back! Sorry for not updating new blog posts about my progress. Because I am at the phase of painting, I am going to start with painting. If you have watched the videos, you would know that first of all we needed to paint our background. With any color we like, we would use a thick brush and slowly spread all the paint we mixed onto our piece. My background color is dark turquoise and it doesn't take me very long to paint my background. How long did it took you? Something I want to share is that there might be some parts on your background that are darker than the others and a technique that was very helpful for me was to leave it there. Don't try to add water or even more paint since it can create a big lump on your paper. I believe that that works because after all, you are still going to add more paint on the top and it would cover it all up. Don't feel worried. CREATE NEO-IMPRESSIONISM ON THE BACKGROUND I created 5 new colors that are somehow very connected to my background color. I mixed a light purple, a dark green, a shiny green, a creamy blue and a rosy red. The color red is kind of opposite but I added it because I think that adding that color can help my background stand out even more. I will update my progress as I go and if you want to keep track of what I am doing, look for my blog posts in the next few days:) We recently have been learning how to draw manga in art class. It was suggested by some fifth graders and mostly everyone thinks it's awesome. Starting to do this, Mr. George informed us about color mixing. We made our own color wheel and practice neo-impression. In order to make a nice manga portrait, we need to know how to mix colors into neo-impression. Neo-impression is a way of coloring that uses many small points and dots. It's a very cool way of coloring and it was invented by Georges Saurat. Mr. George have made some videos on YouTube about how we can practice these things and do them in class. Here are some of the videos about color mixing, manga front view portrait, and manga three quarter view. You can try them on yourself and practice your own drawing skills. * These are all in their own playlists. Drawn by Paul Signac Drawn by Georges Saurat I hope after watching many cool videos, you can create your own drawings:)
In Art class, we are making our own repousses. It's actually very hard to design such a wonderful piece like this . First, we need to draw our own architectures on paper with pencils. Then, we need to trace this on 2 pieces of metal. We worked for many days to make the artworks have textures. At last, we did finish our project. I felt very proud about my artwork. I used different values of colors to mix int he background. The texture of my artwork is also very well-done. I knew how to use contrasting colors to make my artwork look better. The columns I used are from the Greeks are also nice designed. I am very proud of myself. Thanks to Mr. Lundgren for guiding and supporting us throughout the whole process.
In art class first quarter, we made our own O.P art pieces. Mr. George helped us by presenting the steps we need to take on the smart board. We watched it and was able to do it on our own. Due to our best effort, we created amazing arts. Down below is my drawing. I hope you like it. Helen P.S Please leave a comment below. Thanks! |
HelenWe can express our creative thoughts on paper and decorate them with different colors. Everyone has a different color. Art helps me express my ideas. Archives
March 2015
Categories |